 Media Coverage
 Press Release
Authentication in Tableau Cloud
Authentication is crucial in embedding Tableau Cloud sites, allowing users to sign in and access the site after the first login. Tableau Cloud supports various authentication types, including SSO, multi-factor authentication, and Tableau with MFA.
We discussed one of the authentication scenarios in my last blog which is Embedding Tableau Dashboard into a WordPress Website. However, for the integration and embedding of Tableau Cloud content, there are additional mechanisms to authenticate users who access Tableau is also important.
What is single sign-on (SSO) and why it is necessary?
SSO authentication allows users to access multiple applications or systems with a single set of credentials, based on a trust relationship between the identity provider (IdP) and the service provider (SP). This direct trust connection in Tableau-connected apps enhances productivity and satisfaction, especially for developers who can showcase dashboards across multiple devices or in the field. The single sign-on (SSO) experience for individuals is made possible by this trust relationship without the need for integration with an identity provider.
How to configure Single Sign-on in Tableau online using WordPress as an IDP
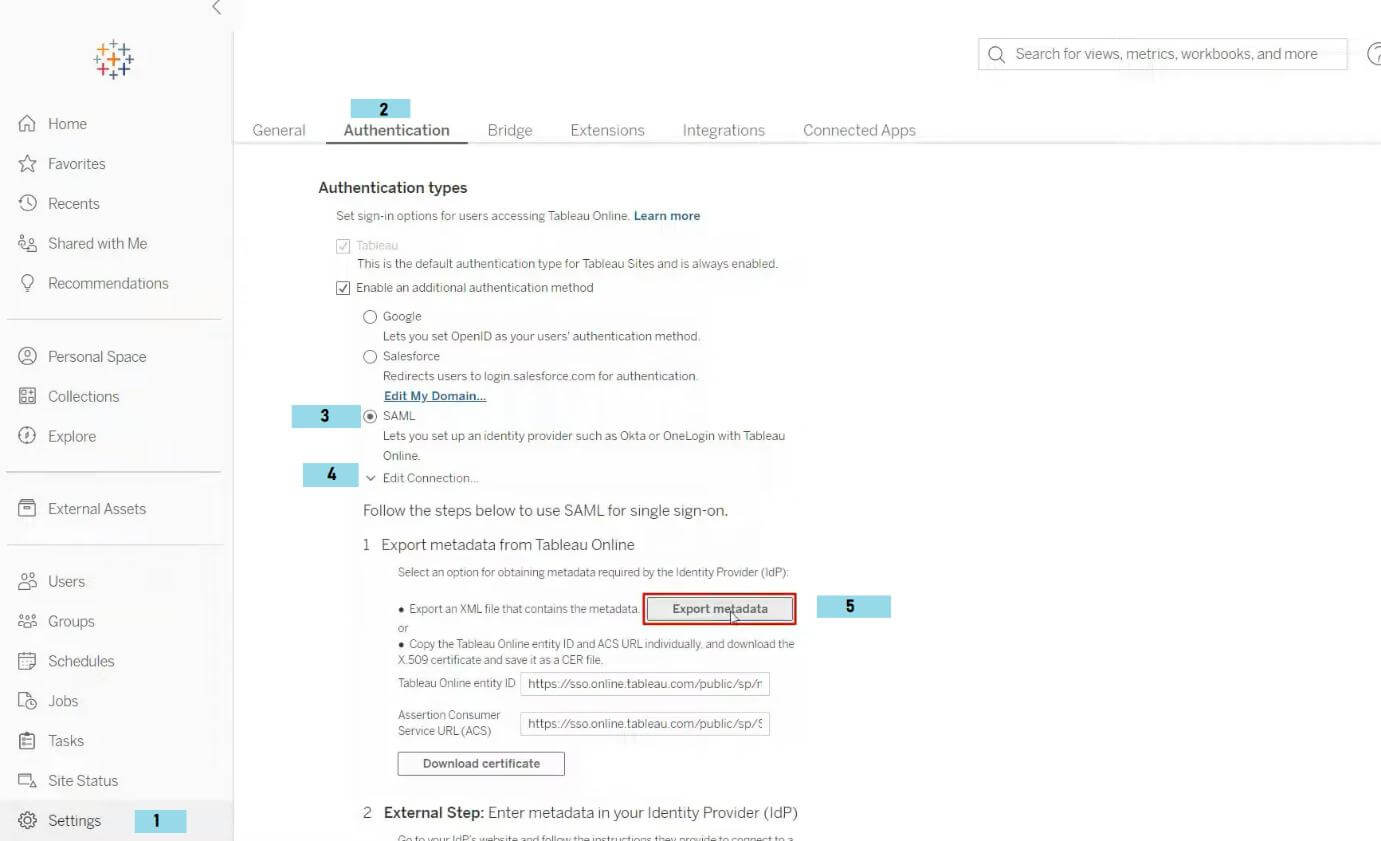
Metadata from Tableau Online SP export
To Metadata export from Tableau Online firstly Log in as “admin” to your Tableau dashboard, select settings, and then click the Authentication tab. Choose SAML as the authentication type, and afterward, click the modify/edit connection button to download the metadata through Tableau Online, and further we will Configure WordPress as IDP.
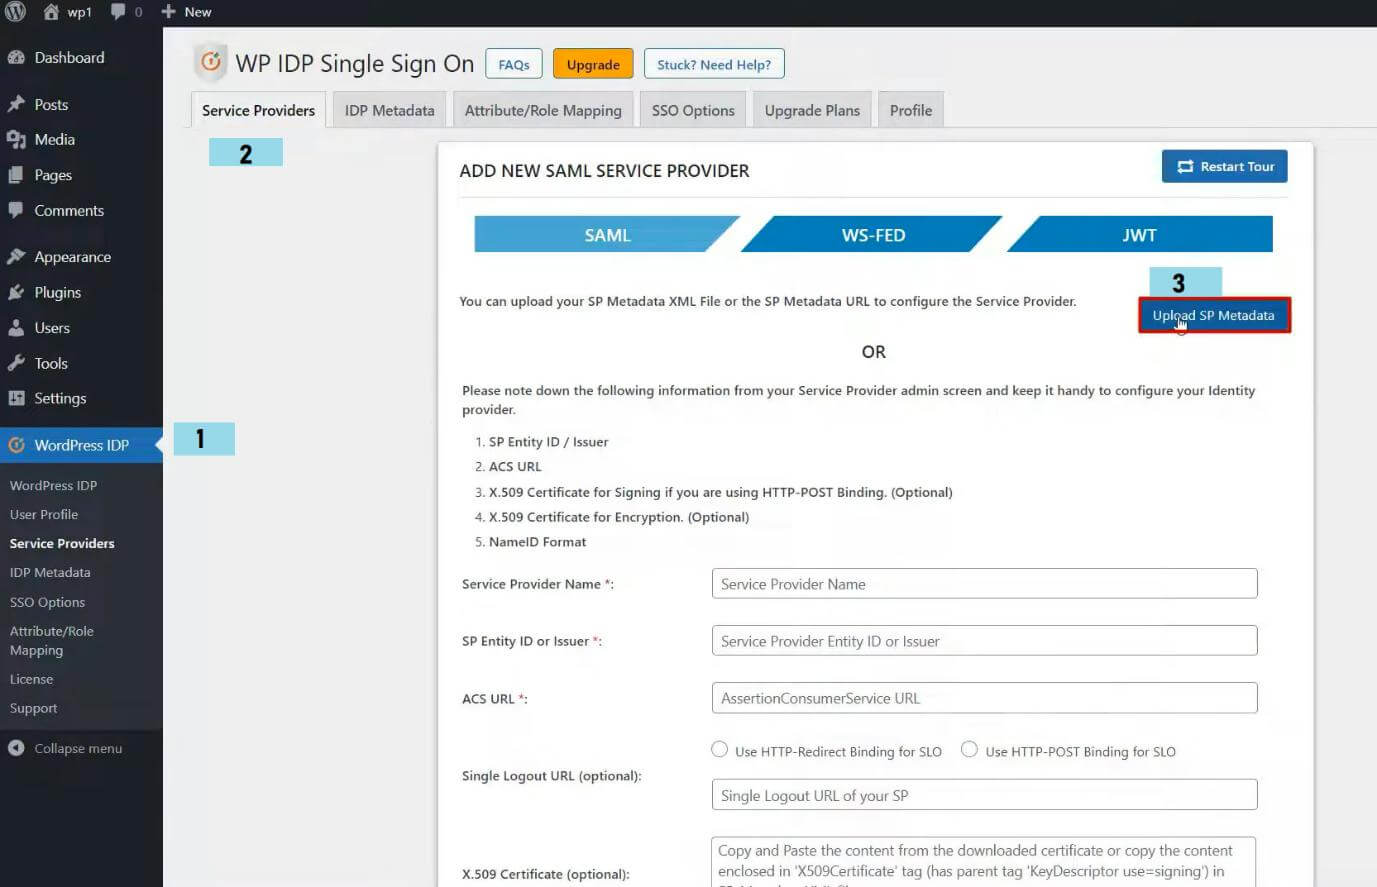
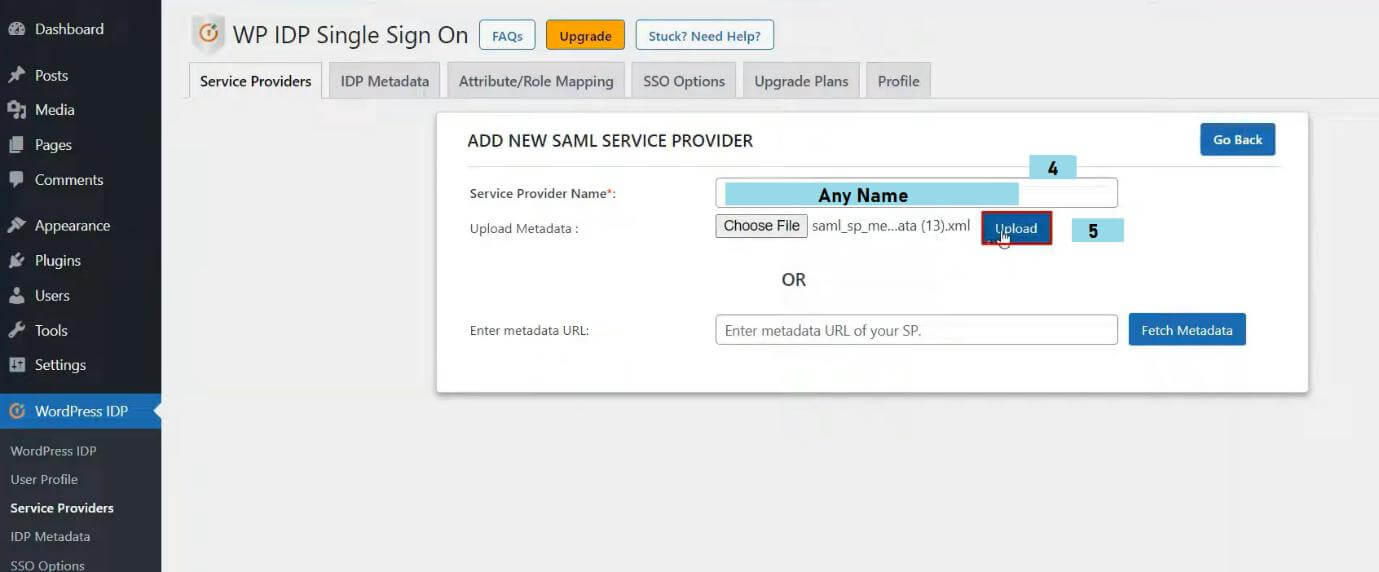
Setup of WordPress as IDP
Now we will Save our SP settings successfully by going to the WordPress admin dashboard, searching for the WordPress IDP plugin, and clicking on the upload SP metadata button. You should then type the name of your SP—in this case, Tableau online, and click on the choose file button to upload the SP metadata file that we previously downloaded.
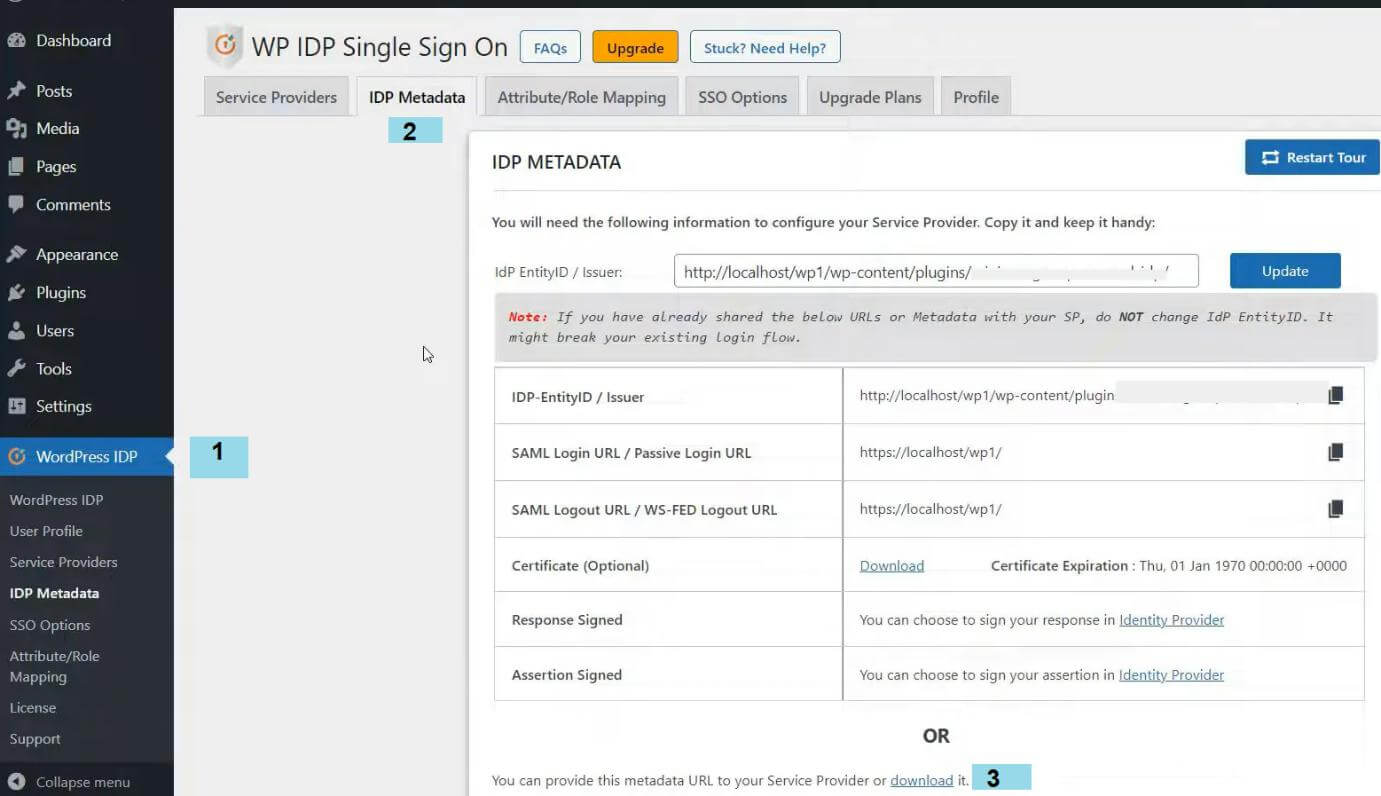
Export metadata from the WordPress IDP plugin
Navigate to the IDP Metadata page, and then click on Download to acquire IDP Metadata for SP Configuration to export metadata from the WordPress IDP Plugin.
Set up Tableau Online as an SP
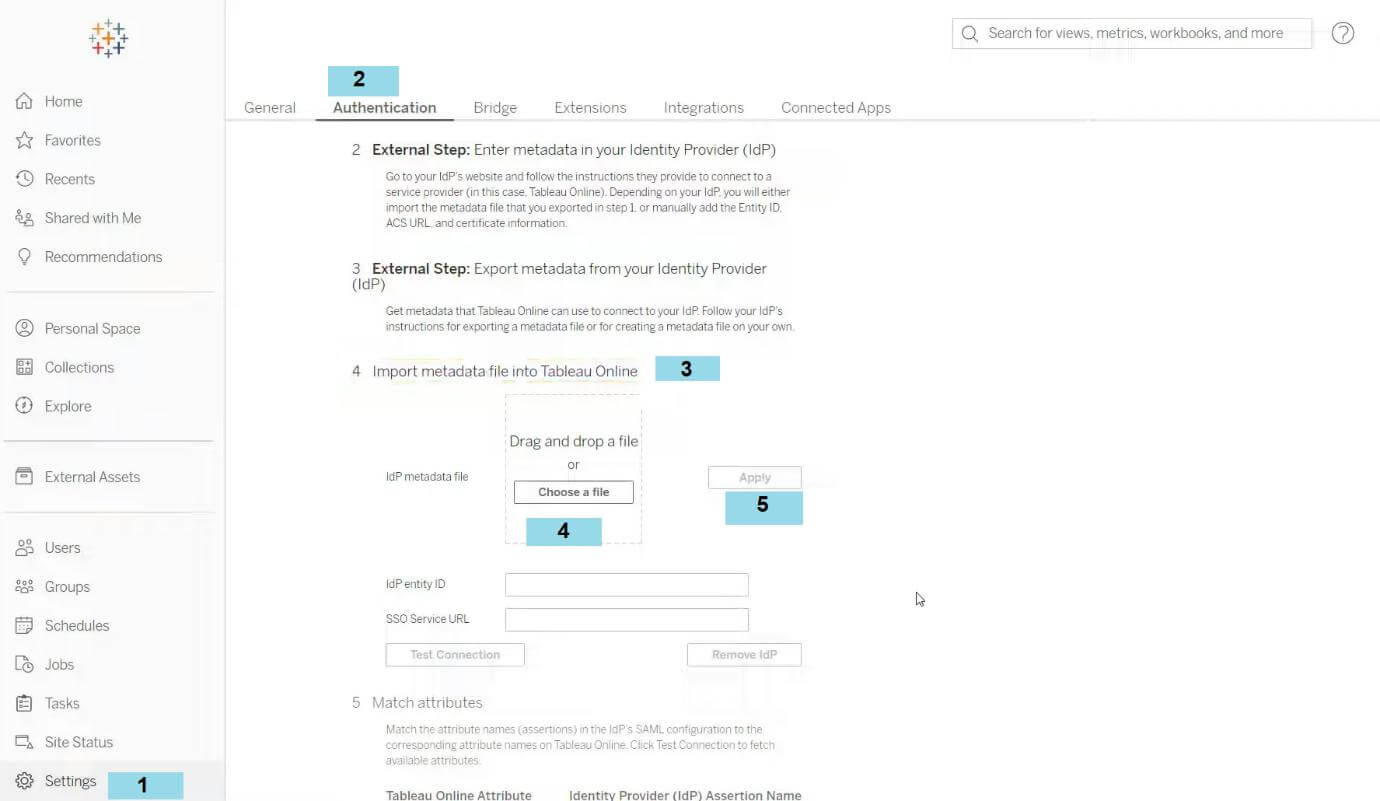
Open the Tableau online and go to the authentication area of Tableau online, scroll down, and select the import metadata file. In the section, click on Choose the file to upload the IDP metadata that we have already downloaded, and then click Apply.
Configure Attribute Mapping
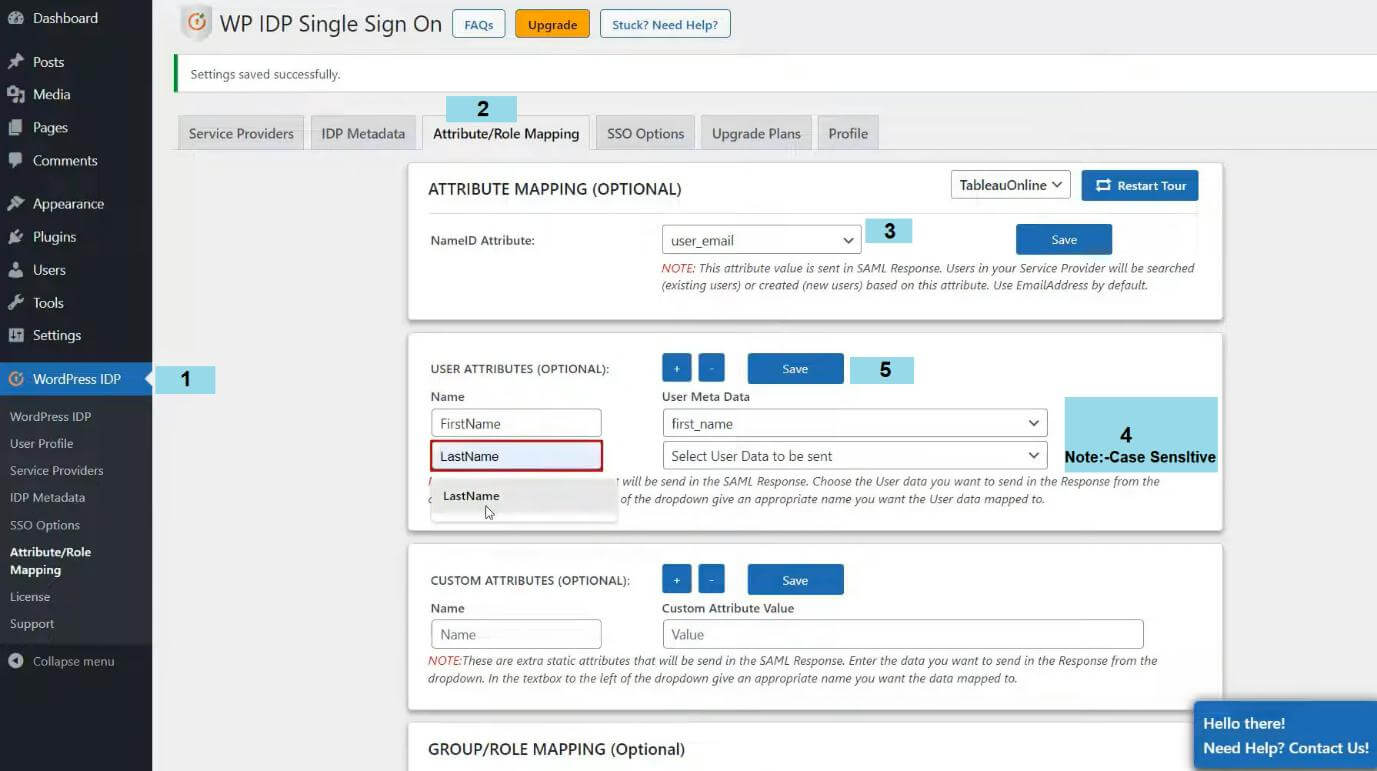
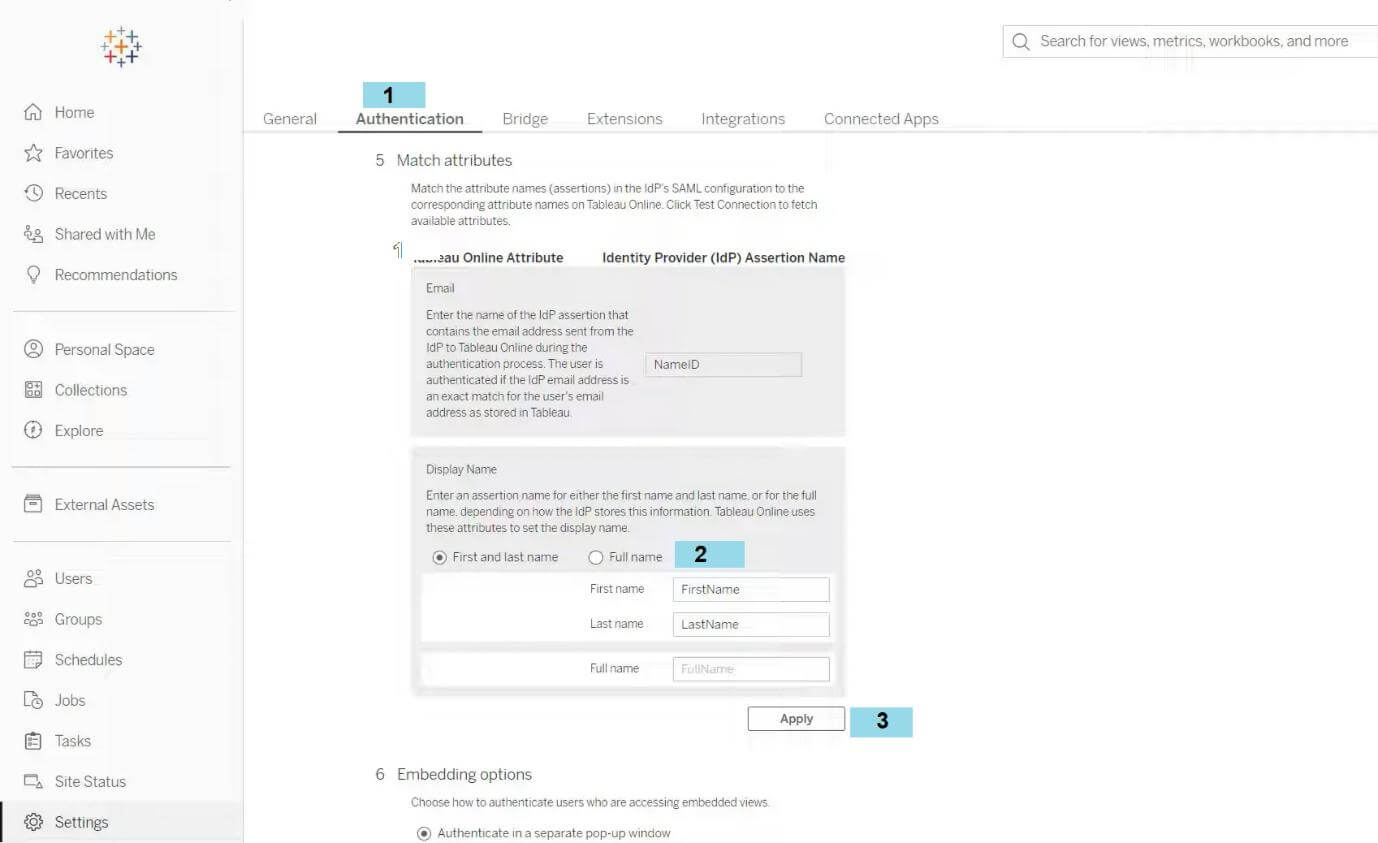
Let’s see how to configure attribute mapping so First open the attribute role mapping tab of the IDP plugin. In the user attribute area, click the add button to add attributes after selecting the proper name, and id attributes. To finish the attribute mapping, fill out the necessary fields, then click “Save.” The names of the attributes are case-sensitive. To match the names of the attributes as listed in the WordPress IDP plugin to the attributes in Tableau online, visit the match attributes area, choose the first, and last name option in the display name, and then click Apply to Save Attribute to enable SSO so that users can access.
Enable SSO for users
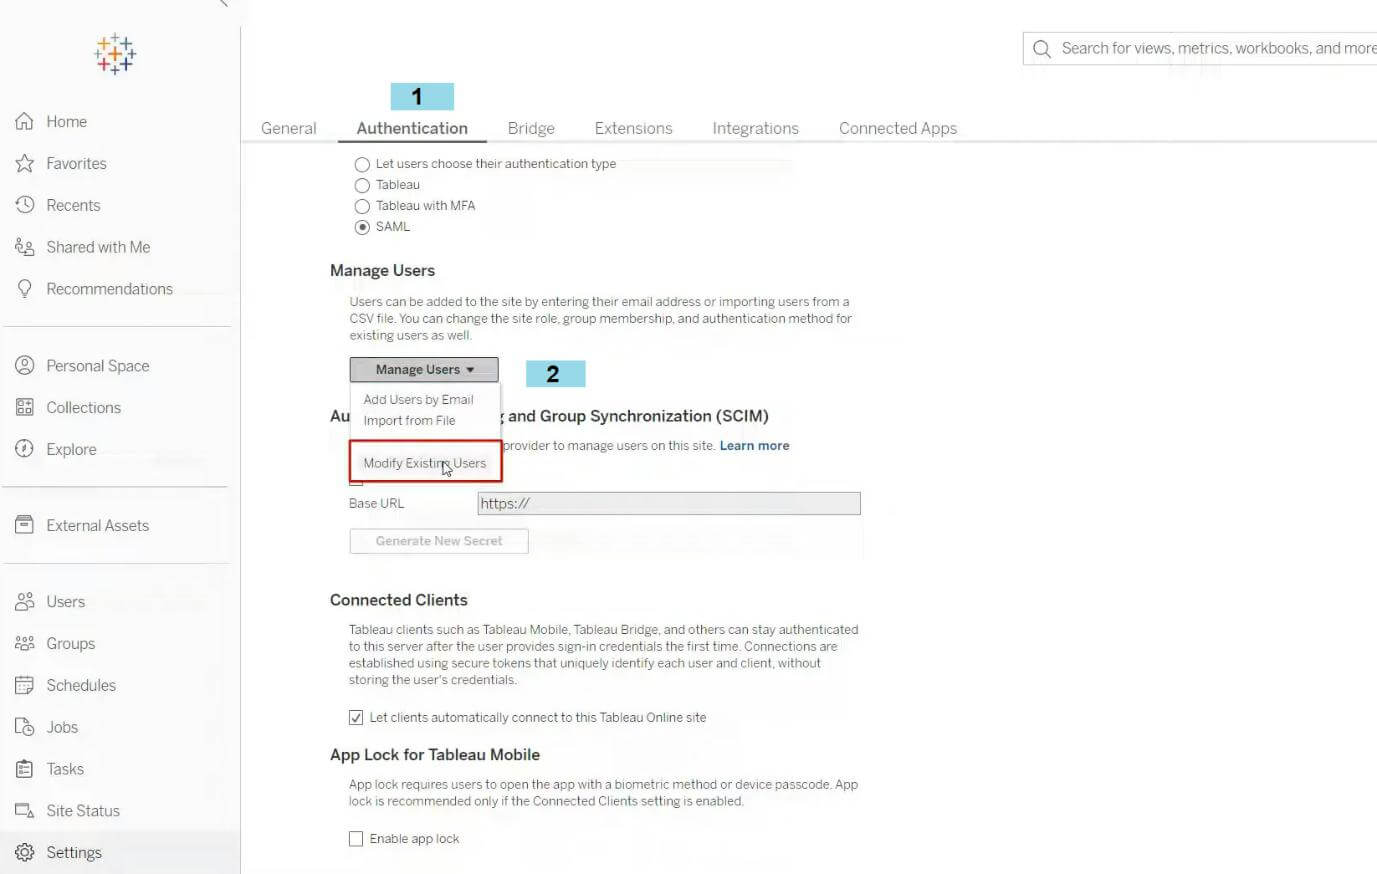
The setup is complete; now let’s test the SSO for the user authentication section.
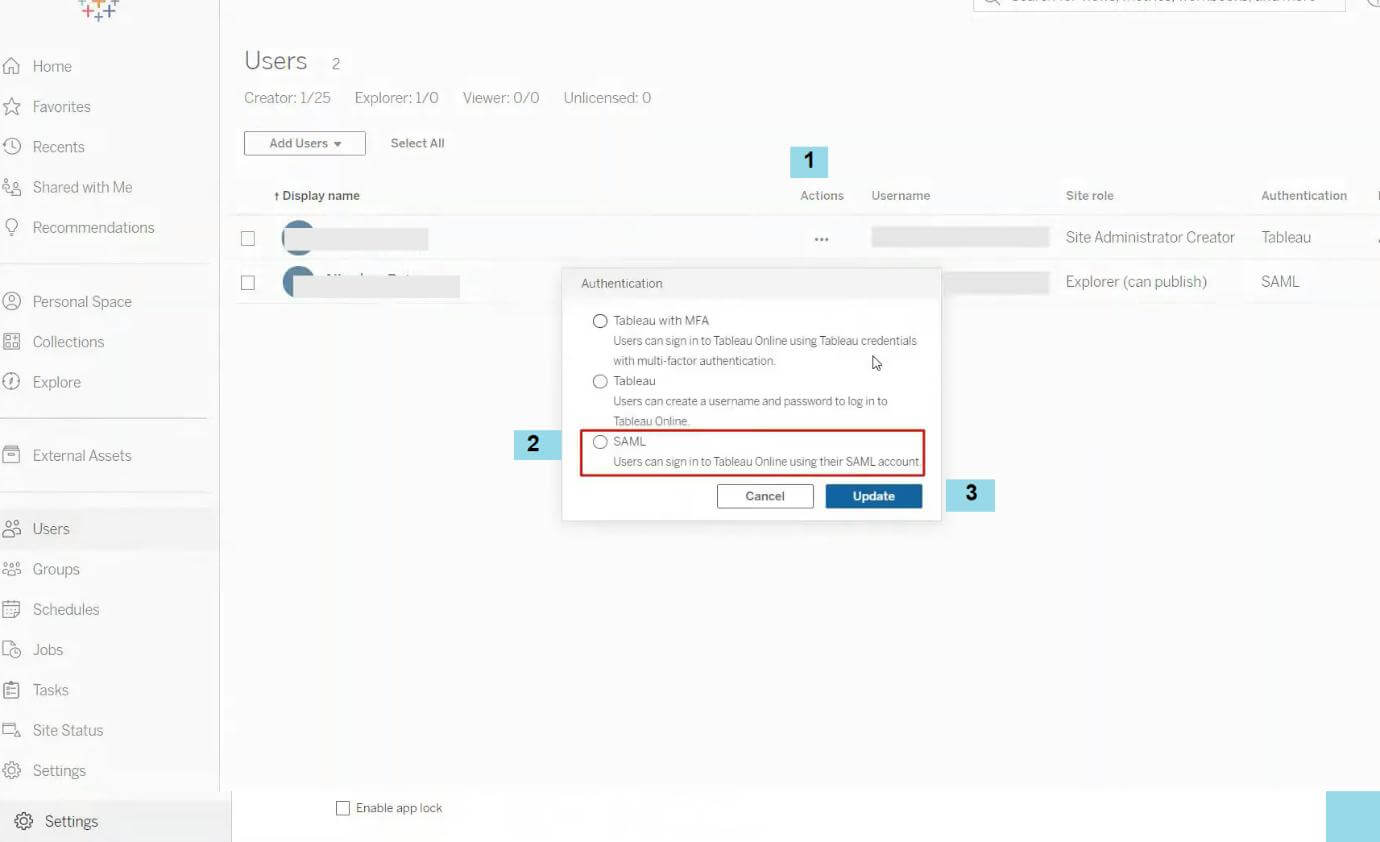
select Modify Existing Users. Then select the user you wish to modify by choosing the option under the Actions column.
Test SSO connection Embed Tableau Views
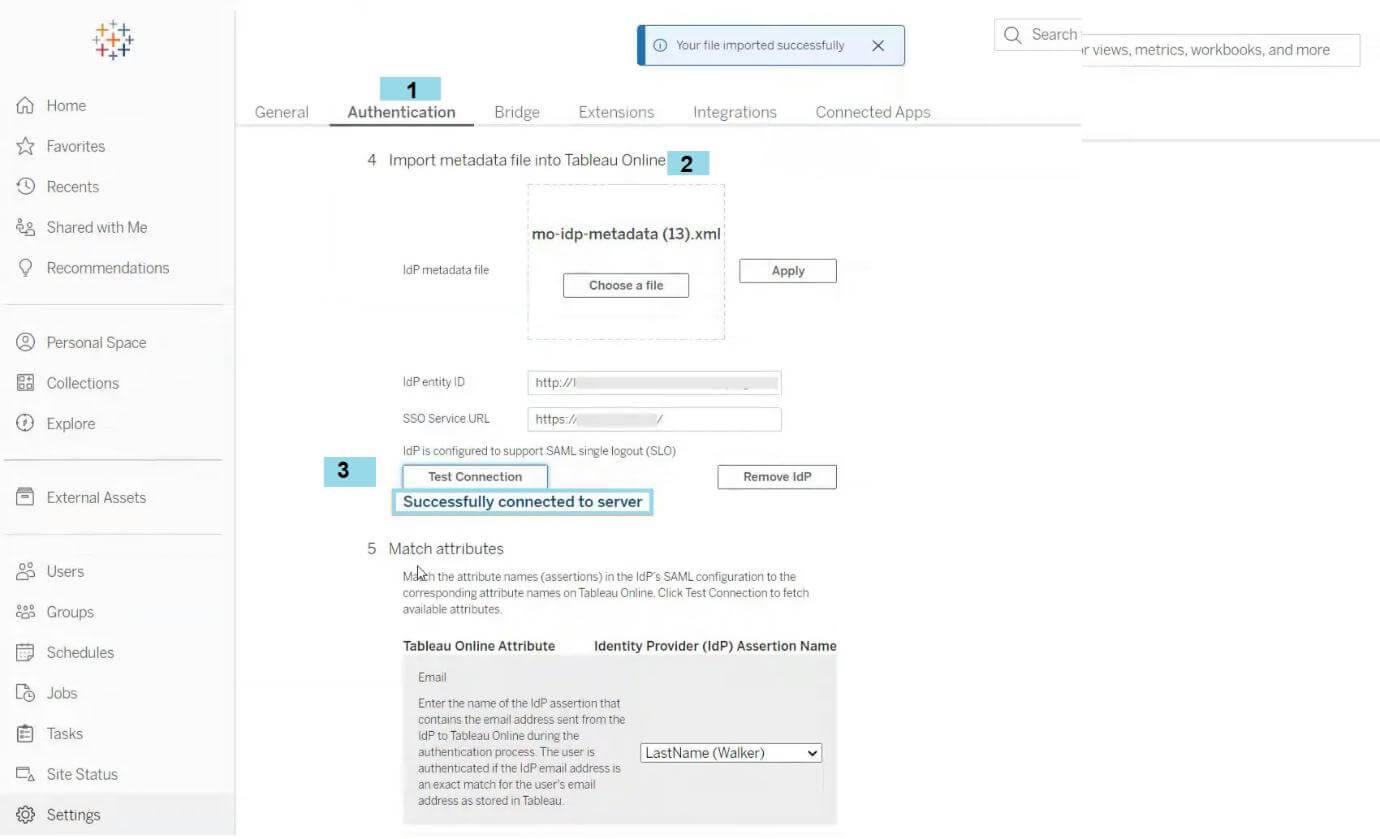
For SSO connection testing In Tableau online view, navigate to the import metadata file section under the authentication area, click on test connection, and then enter your login information. To include Tableau Views SSO connection testing. When you get the message “You have successfully connected to the server,” the connection between WordPress, and Tableau Online was set up successfully. This was confirmed by testing the connection using the WordPress IDP plugin.
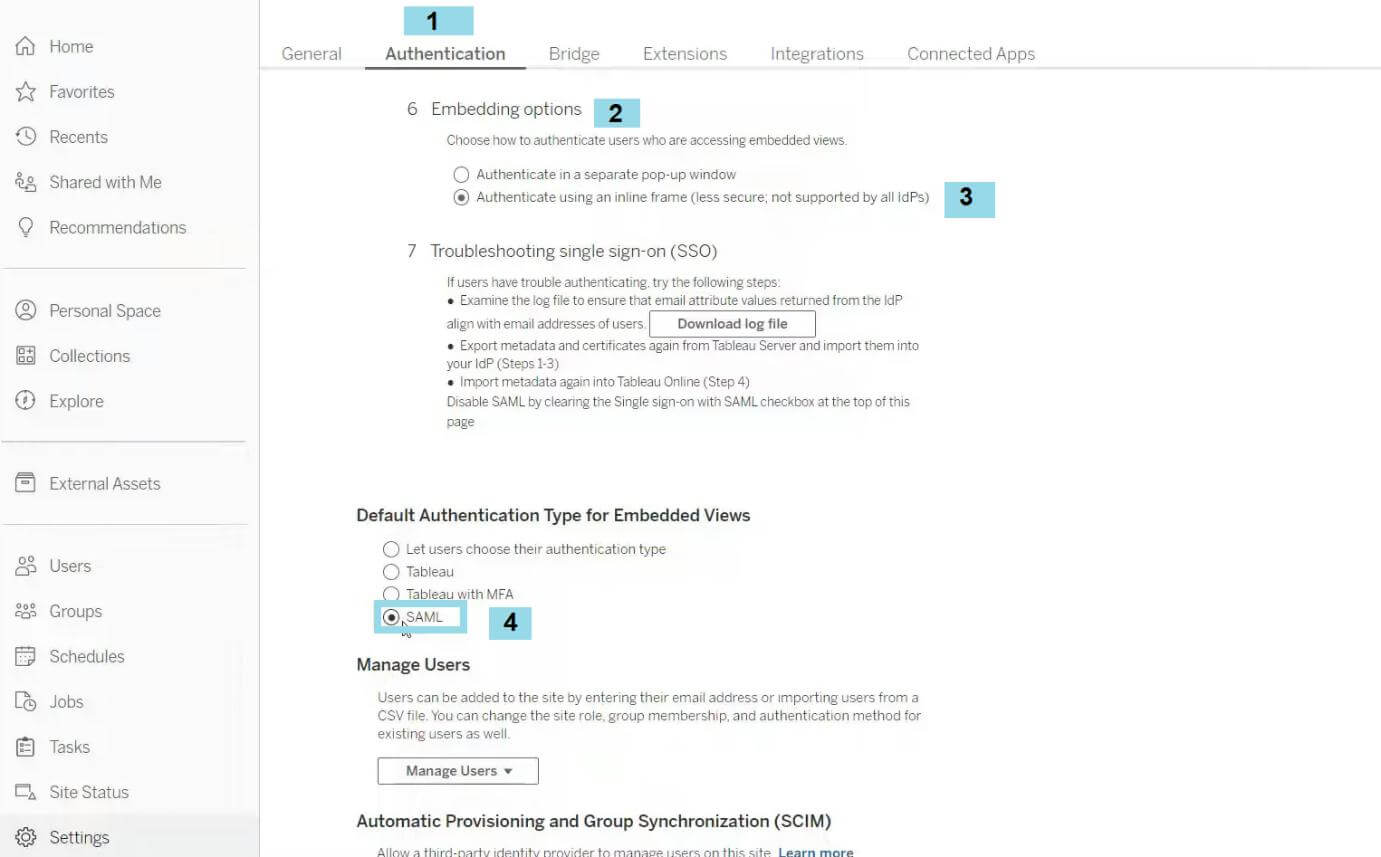
When we want to comprehend how to insert views into your WordPress website, tableau presently goes to embedding options and chooses the embedded views’ authentication type to use an inline frame from the authentication settings, then click the default authentication type for installed embedded views and choose SAML.
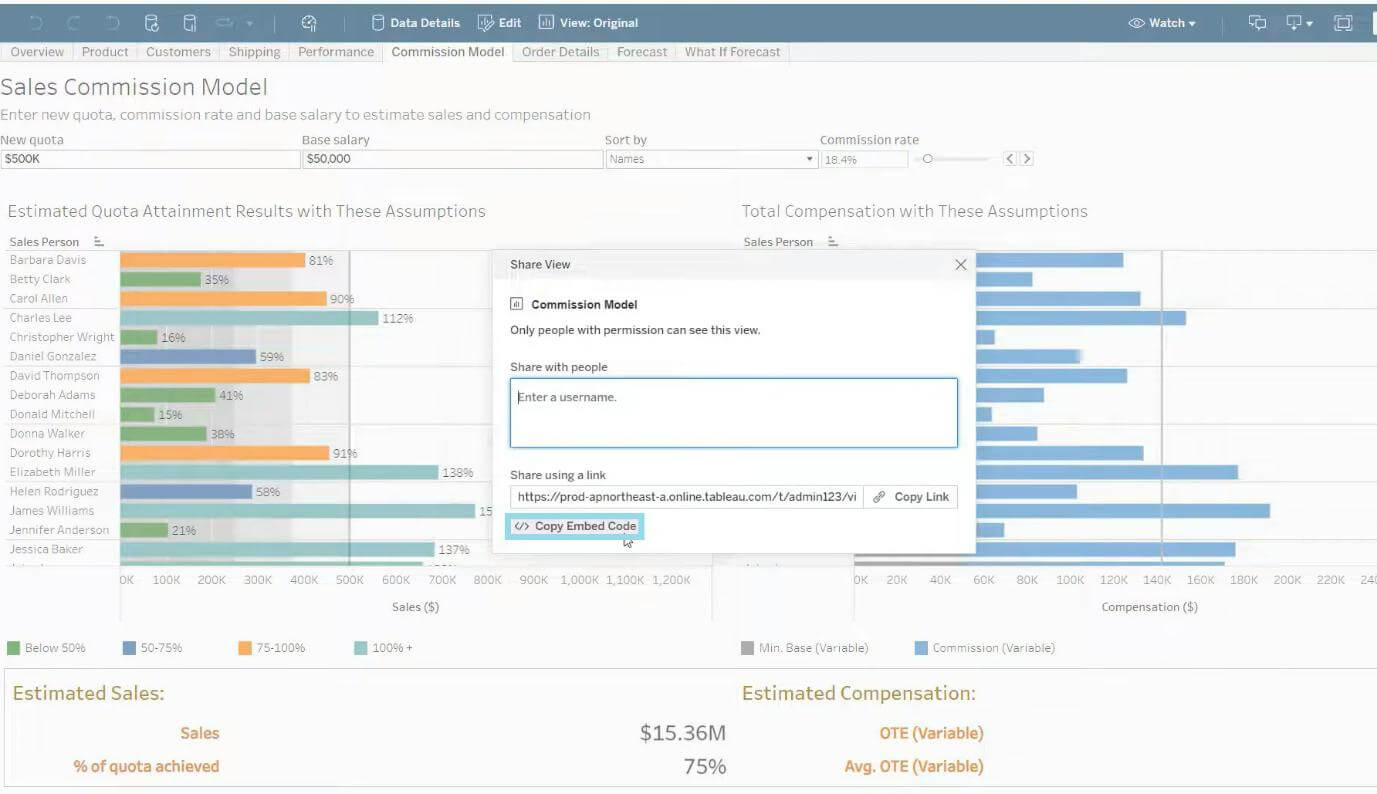
Go to your Tableau online home view, choose the view you wish to embed, then click Share, and Copy Embed Code.
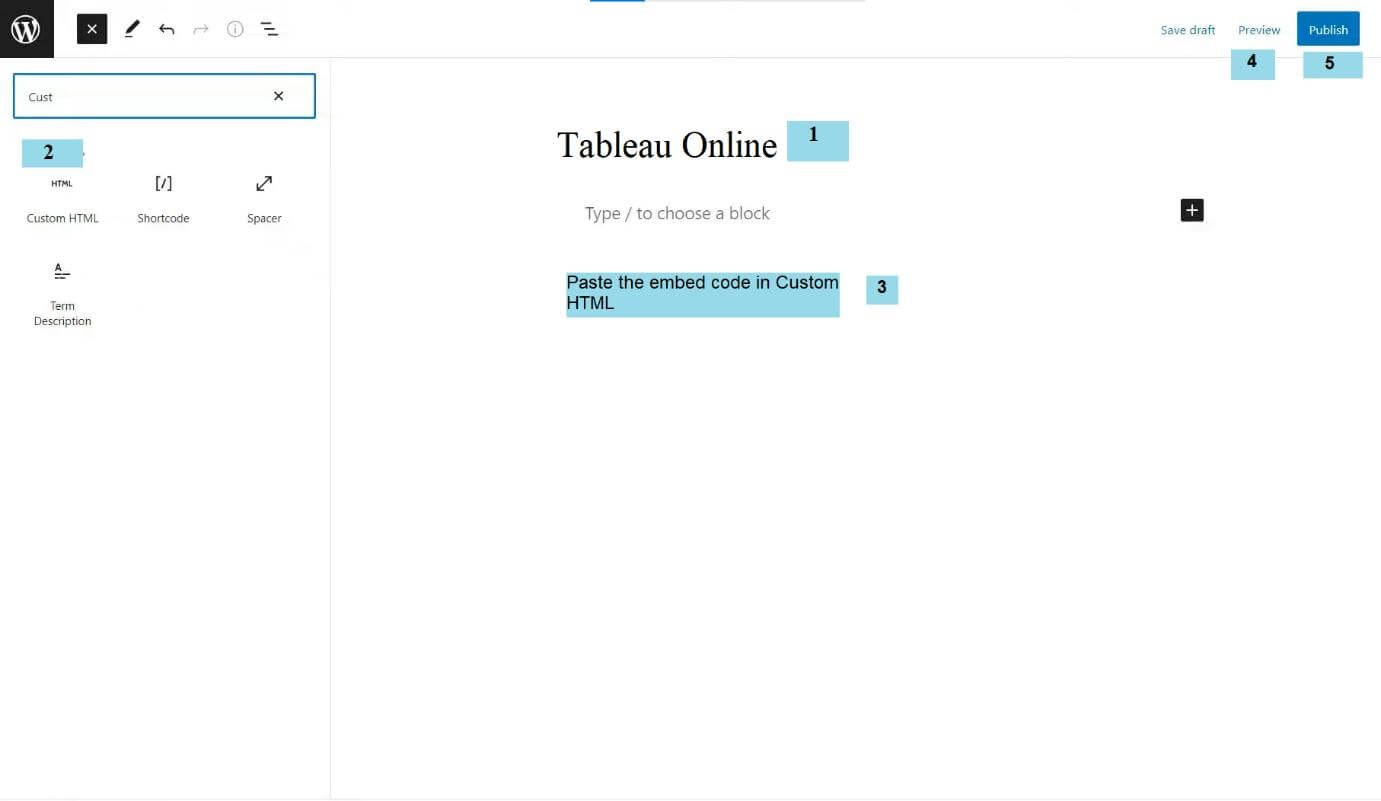
Next, go to your WordPress site, make a page, give it a title that suits your needs, and then click the make Button. Look for custom HTML in the search bar, select the custom HTML widget, paste the embed code, and click preview to see if the embedded views are as you expected. Then, click publish, and view the post to confirm that the desired outcomes were obtained. We have successfully embedded views in your WordPress website using Tableau Online.